主题
DSH是什么
DeepSeek Harness(dsh)——DeepSeek AI 开发的开源 agent harness(智能体框架/运行时)。
一个「一切皆插件」的 AI 智能体运行框架,用来构建、组合和运行能调用工具、操作文件、执行代码、搜索网页、管理子任务等的 LLM Agent。
它基于 Cordis 的插件架构构建,并托管了 Cordis 的源码(vendor/ 目录)。
- 对标的不是你的工作流:它更像是在直接对标Claude Agent SDK这类开发者工具,而不是Claude Code或Codex这样的最终用户产品。
- 一个"模组化"的底座:它的口号是**"一切皆插件"**(Everything is a Plugin)。模型、工具、存储、UI,所有组件都能自由替换和组合。它给开发者的不是一辆整车,而是一个可以自己组装、改造的汽车底盘。
https://www.deepseek.com/harness/
github: https://github.com/deepseek-ai/deepseek-harness
开发文档: https://deepseek-harness.github.io/deepseek-harness/develop/basic/
Cordis插件架构
框架目录结构
主要功能
- 跑一个 agent:npx @deepseek-ai/dsh web 启动带 Web UI 的智能体界面(默认 http://127.0.0.1:3080),也可用 CLI / ACP / JSON-RPC 方式调用
- 即插即用的能力插件,仓库里已经实现了一整套能力集:
- shell / subprocess —— 执行 shell 命令、管理子进程
- fs —— 带策略约束的文件系统读写
- web —— 网页搜索与抓取
- lsp —— 语言服务器支持
- llm —— LLM 服务定义 + DeepSeek 提供方
- e2b —— 沙箱(POC)
- terminal —— 持久会话
- subagent / workflow / todo / plan —— 子 agent、工作流、待办、计划模式
- compaction / context / guard —— 上下文压缩、请求上下文、循环卫生与工具超时
- credentials / settings / identity —— 凭据、用户设置、匿名身份
- interaction —— 审批/交互、权限、命令、询问用户
- 可定制组合:通过 cordis.yml(preset 插件)按会话组装不同的 agent 行为
典型用途
- 作为 agent 应用的运行时底座,通过 plugin 机制定制自己的工具和能力
- 类似 Claude Code 这类编码助手的开源参考实现
- 通过 examples/ 下的 cordis.yml leaf 文件体验各种 demo
现状
- 开发者预览阶段,快速迭代,会有破坏兼容性的变更
- 需要 DEEPSEEK_API_KEY 才能跑真实 API 的测试/demo
- 按 CLAUDE.md,修改 packages/ 前要先读 docs/architecture.md,因为整个产品 API 骨架(session、system-prompt、tools、agent、agent-loop)都在这套插件体系里
Web UI
shell
nvm use 22.20.0
npx @deepseek-ai/dsh web
shell
Need to install the following packages:
@deepseek-ai/dsh@0.1.0-rc.7
Ok to proceed? (y) y

npm warn deprecated node-domexception@1.0.0: Use your platform's native DOMException instead
dsh web: http://127.0.0.1:3080内测申明
DeepSeek Harness 目前的 0.1 版本仍处在面向 Harness 开发者进行测试的阶段,还有许多地方需要持续改进和打磨,希望听取广大开发者的反馈建议。预计 DeepSeek Harness 的核心插件以及基础 API 都会在接下来的一段时间内快速迭代、持续演化。

我们期待与全球开发者一起,在开源、开放、可复用、可组合的基础设施之上,共同探索智能上限。欢迎全球 Harness 开发者加入 DSH 插件生态。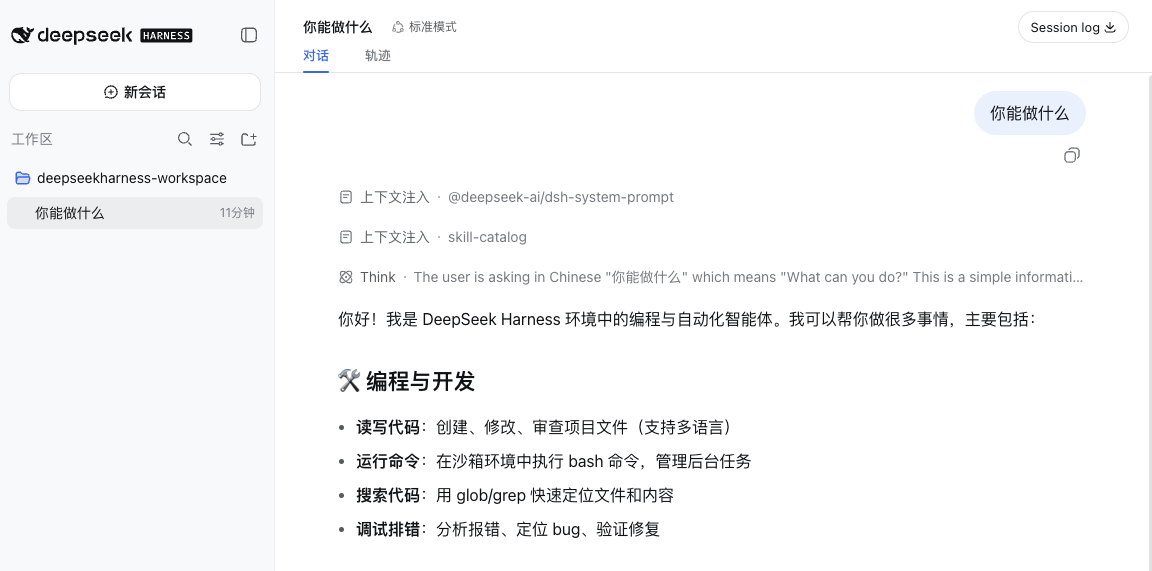
源码安装
shell
git clone https://github.com/deepseek-ai/deepseek-harness.git
cd deepseek-harness
pnpm install
pnpm run build
pnpm dsh web
第一个DSH插件
1、创建插件文件 my-plugin.ts
shell
mkdir -p first-plugin/srctypescript
import type { Context } from '@deepseek-ai/cordis'

export const name = 'hello-plugin'

export function apply(ctx: Context) {
  // Required dependencies are ready before apply runs.
  console.log('[hello-plugin] plugin loaded!')
}
2、注册到 cordis.yml
shell
- insert:
    - id: hello
      name: '/Users/wangxiaomin/Documents/deepseek-harness-master/first-plugin/src/my-plugin.ts'
3、运行
npx @deepseek-ai/dsh@latest web --patch ./first-plugin/cordis.yml
[hello-plugin] plugin loaded!
dsh web: http://127.0.0.1:3080
第一个工具插件
1、创建插件文件 first-plugin/src/my-plugin.ts
2、创建 first-plugin/package.json
3、注册插件到 cordis.yml
4、运行插件
5、使用插件
详细步骤
1、创建插件文件 first-plugin/src/my-plugin.ts
typescript
import type { Context } from '@deepseek-ai/cordis'
import { defineTool } from '@deepseek-ai/dsh-tools'

export const name = 'greet-tool'
export const inject = ['tools']

export function apply(ctx: Context) {
  console.log('[greet-tool] plugin loaded!')
  ctx.tools.register(defineTool({
    name: 'greet',
    description: 'Greet someone by name.',
    parameters: {
      name: { type: 'string', required: true, description: 'The name to greet' },
    },
    output: {
      schema: { type: 'string' },
      render: (_args, value) => [{ type: 'text', text: value }],
    },
    async execute(args) {
      return `Hello, ${args.name}!`
    },
  }))
}
2、创建 first-plugin/package.json
json
{
  "name": "first-plugin",
  "version": "1.0.0",
  "type": "module",
  "main": "./src/my-plugin.ts",
  "dependencies": {
    "@deepseek-ai/cordis": "latest",
    "@deepseek-ai/dsh-tools": "latest"
  },
  "peerDependencies": {
    "@deepseek-ai/cordis": "*"
  }
}
3、注册到 cordis.yml
shell
- insert:
  - id: hello
    name: '/Users/wangxiaomin/Documents/deepseek-harness-master/first-plugin/src/my-plugin.ts'
4、运行
npx @deepseek-ai/dsh@latest web --patch ./first-plugin/cordis.yml

[greet-tool] plugin loaded!
dsh web: http://127.0.0.1:3080shell
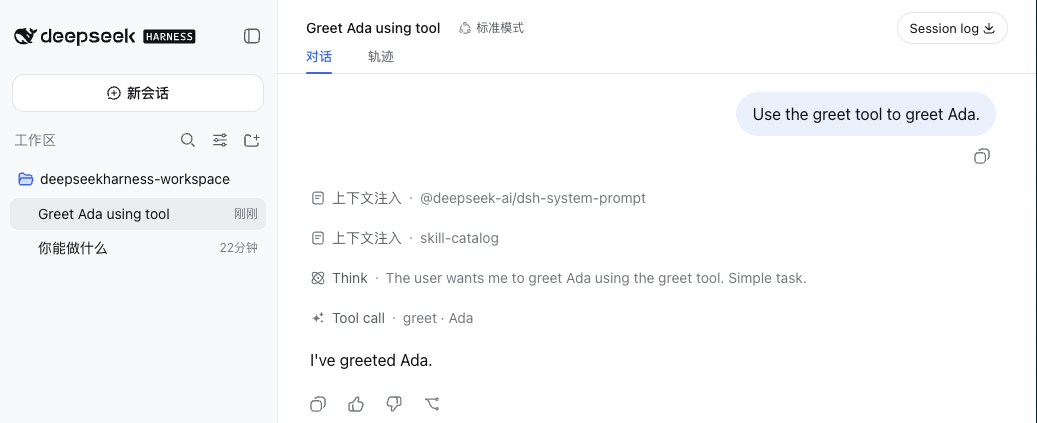
Use the greet tool to greet Ada.